
Working with Studies
Creating, sending, querying and exporting DICOM studies
Beyond the Quick Start workflow, MODALIZER+ gives you full control over how studies are created, routed to PACS, searched for with Modality Worklist and Query/Retrieve, and exported to portable media.
New Patient Workflow
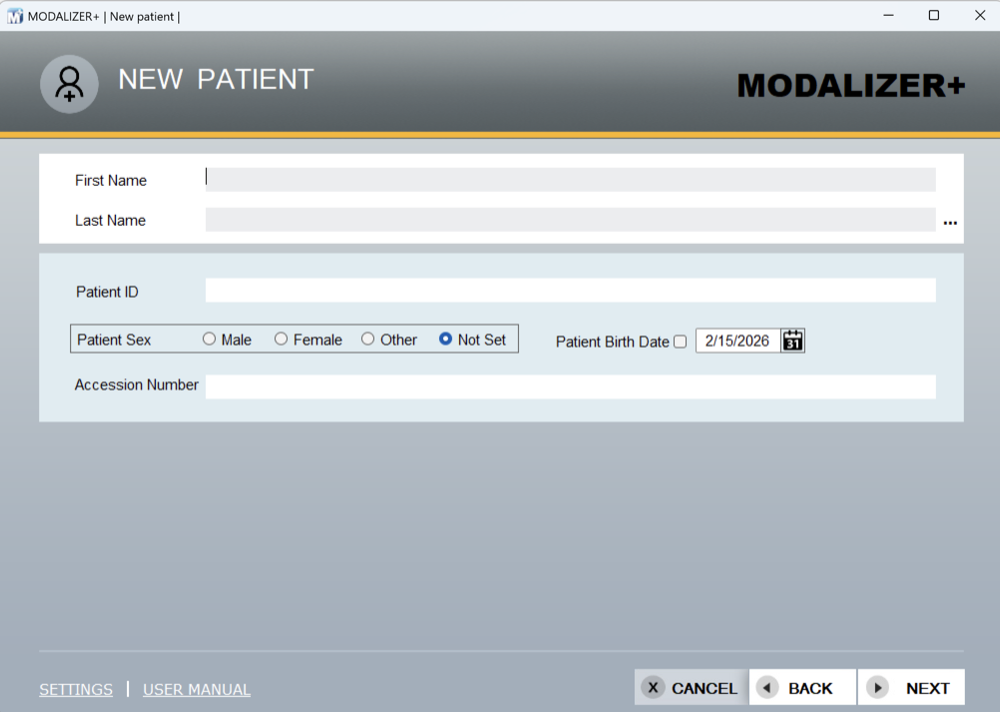
- Select New Patient from the main menu. Click the “…” button to show or hide the Prefix, Middle Name and Suffix fields.
- Enter the patient’s information (optional), then click Next.
- Compose the study with images and a report, then click Next again.
- Optionally create a formatted PDF report as described in the Reporting chapter.
Click the layout button to switch the presentation between thumbnails and list view, or click the “Patient name…” strip to see full procedure details.
The Convert Screen
The Convert screen has three panels:
- Destination and report type – where converted files are saved (a new directory per conversion, under the storage location defined in Settings if “Use Local Archive” is enabled, or any folder you choose otherwise), the report title, and whether to create the report as a DICOM SR (default) or an encapsulated PDF.
- Image format – “Automatic” (default, converts each file type as-is), “Uncompressed”, “J2K” (JPEG 2000), or “JPEG” (Encapsulated JPEG, Lossy Transfer Syntax) – plus the option to build one multi-frame file from a series of same-format, same-size images.
- Conversion action – Convert only, Convert and create a DICOMDIR, or Convert and send to PACS (requires a Storage Server to already be configured).
Sending DICOM Images to the PACS
DICOM files are typically stored on a PACS so they can be accessed from other DICOM applications. After acquiring study images, the Convert screen appears – select “Convert and send to PACS”. If no PACS is configured yet, click Settings to add one, then click Next and Send to.
You can also send a completed study to multiple destinations from the operation-completed screen.
Modality Worklist Query
To use the Modality Worklist service, first configure a Worklist Server. Click Modality Worklist in the main menu to search it.
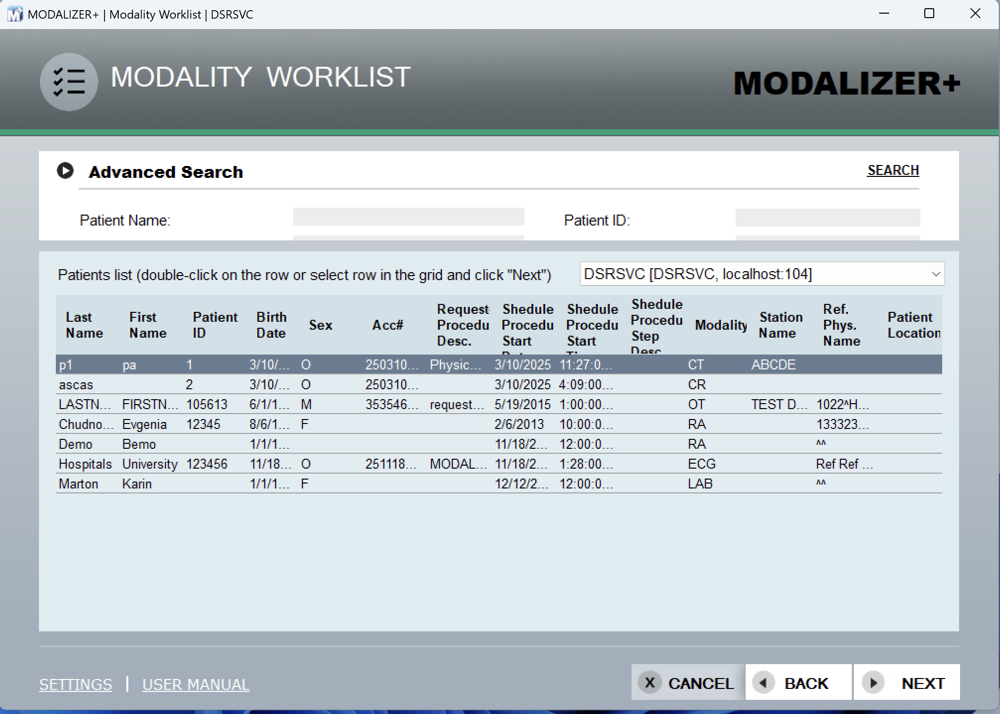
The basic search matches by patient name or patient ID; use wildcard characters “?” (single character) and “*” (any number of characters) if you’re unsure of the spelling. Click Advanced Search for more options, such as a date range or accession number – you can also start the search by pressing Enter in any Advanced Search text box.
A default search filter for “today” and/or a specific scheduled AE title can be set in the Worklist Server settings. On opening, the query goes to the default MWL server, but you can switch servers from the list under the search panel. MODALIZER+ uses the attributes returned by the query to pre-fill the new study’s images and report.
Double-click a result row, or select it and click Next, to start documenting the study. If “Two step verification” is enabled in Worklist Server settings, the selected entry’s data is shown in a confirmation dialog before the procedure starts. Right-click a row to copy/print patient and study info, or run a Custom Action using the selected data.
Query/Retrieve – Searching the PACS
Query/Retrieve (Q/R) is the DICOM service that lets you search for objects already stored in a PACS – by patient name, creation date, modality, and more – and retrieve them for viewing or other purposes. Configure a Storage Server first, then select Query Retrieve from the main screen.
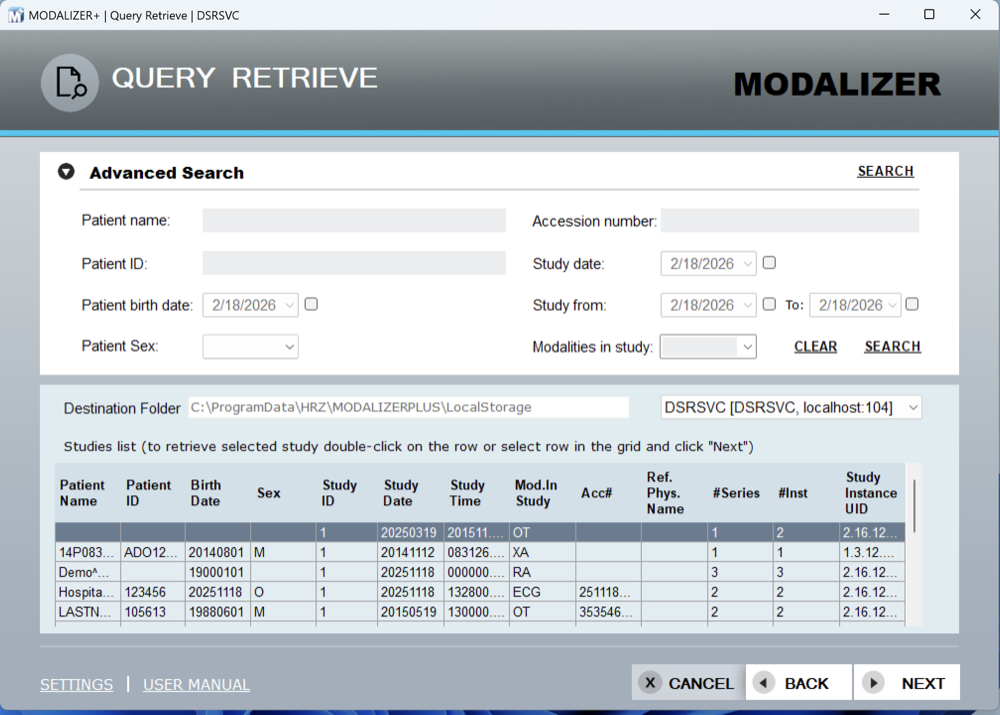
Set your search criteria and click Search (leaving all fields blank lists every study on the server, which isn’t recommended and may take a long time) – or press Enter in any Advanced Search field. The query goes to the default Storage server on open, switchable from the list under the search panel.
Double-click a result, or select it and click Next, to retrieve the matching DICOM files into your destination folder and open them in the Viewer. Right-click a row to copy/print patient and study info, add a new series to an existing study, or run a Custom Action.
Export – Burn CD/DVD
MODALIZER+ creates portable medical records – specific studies and reports with an embedded DICOM Viewer – ready to burn or copy anywhere. For the basic step-by-step, see Export DICOM Removable Media in the Quick Start Guide; this section covers the full set of export options.
Select Export from the main screen. MODALIZER+ prepares the media using standard filenames in Patient–Study–Series–Image hierarchy and creates a DICOMDIR file. The Export screen has two parts:
- Source and scan – browse to the source folder, then click Scan to verify the studies it contains (nothing is shown if no valid DICOM files are found).
- Export mode – choose one of three options:
- Rename and arrange DICOM files, create DICOMDIR in place – renames and hierarchically arranges the original files, and writes DICOMDIR to the root folder.
- Copy, arrange and rename DICOM files to a new folder – copies and arranges files into hierarchy in a destination folder you define, and writes DICOMDIR there.
- Just create DICOMDIR (not recommended) – only writes DICOMDIR alongside the existing files without renaming them; may not fully comply with the DICOM media standard if filenames don’t already match it.
Check Include DICOM Viewer to DICOMDIR to bundle MODALIZER+’s viewer on the disc. To anonymize/de-identify the exported files (available only with the “Copy, arrange and rename” option), check Anonymize – with an additional option to strip all private (non-standard) DICOM attributes. Click Next, select the destination drive, and click Burn to disc.
← Previous: DICOM Editor | Next: Reporting →
DICOM is the registered trademark of the National Electrical Manufacturers Association for its standards publications relating to digital communications of medical information.