
Quick Start Guide
A step-by-step walkthrough of MODALIZER+’s core workflow
This guide demonstrates MODALIZER+’s core capabilities from a blank screen to a completed DICOM study: starting a new patient, capturing or scanning images, writing a report, exporting to removable media, connecting to a PACS/RIS, and using the built-in Local Archive.
- You can open this User Manual from any screen in MODALIZER+ by clicking the “User Manual” button at the bottom left corner of the application window.
- MODALIZER+ can be started from the command line with parameters – see the Command Line Parameters reference.
- Every function in the main menu has a unique color code that carries through to the following screens’ icons and title bar.
The New Patient Wizard
In this workflow the patient and study information is entered manually and stored in the generated DICOM files.
- Click New Patient in the main menu.
- Enter the patient’s data. Click the ellipses to the right of the patient last name text box to add middle initial, prefix and suffix. Click Next.
- MODALIZER+ recognizes TWAIN/WIA-supporting devices connected to your computer. Select one from the drop-down menu on the top left of the image preview panel.
- Alongside the embedded image capture module (the red button), two standalone external applications are available: the Scanner Exap (scanner button) and the Camera Exap (two concentric red circles).
- Select files from your computer with Add files, capture images from the camera preview panel, or drag-and-drop files directly onto the MODALIZER+ window. Click Next.
- To record video, click the two-circle red button to open the video capture application (Camera EXAP).
- Select Convert for Action and click Next.
- Click View to display the new study in the DICOM viewer, then Done to return to the main menu.
Capturing Images and Scanning Documents
MODALIZER+ automatically detects and connects to TWAIN/WIA-supporting devices – your laptop’s built-in webcam, USB cameras, and most document scanners. When a supported imaging device is detected, the capture and preview panels appear automatically. MODALIZER+ can work with multiple image sources at once and switch between devices within the same procedure.
MODALIZER+ can also capture video from any device compliant with the USB Video Device Class (UVC), plus MPEG-2, MPEG-4 and HEVC video files. Click the “Camera” button at the bottom left of the video panel to start capturing.
When a scanner is connected, clicking the red capture button launches the scanner’s own interface; scanned documents are added to the attached-documents panel at the bottom of the screen.
- Check “Use Scanner UI” at the bottom of the settings screen to launch the scanner driver application directly from the capture button, so you can adjust scan parameters from the driver itself.
- Use Add files to browse for images and documents and attach them to the procedure.
- Click the pencil icon on any image thumbnail to add a comment. Comments are only inserted into the converted file if edited; if you build a single multi-frame DICOM file, comments are inserted into its “PerFrame” sequence.
Filling a Report
MODALIZER+ is a fully automated, customizable reporting tool integrated with your PACS and Worklist Manager. Its Formatted Report feature automatically fills patient and study information into your own report templates – add your logo, signature, and stationery style.
There are three ways to add a report from the acquisition screen:
- Formatted Report – select a predefined template and click “Formatted Report” to generate a new PDF pre-filled with the case data. Edit, save as PDF, and close the editor.
- Attach an existing PDF – select a PDF using “Add files” or drag-and-drop it onto the acquisition screen.
- DICOM Structured Report – type directly into the report text panel.
See the full Reporting chapter for template configuration and DICOM SR details.
Export DICOM to Removable Media – CD/DVD/USB
To burn DICOM studies to a disc, verify that your computer has a CD/DVD writer – or export to any removable media such as a USB drive, or to a directory on your hard disk.
- In the main menu, click Export.
- Select the source folder containing the files to export, then click Scan. MODALIZER+ reads the file data and displays the study details.
- Verify that “Copy, Arrange and Rename” is selected, and check “Include DICOM Viewer to DICOMDIR”.
- Select a destination folder, then click Next.
- Select the destination drive for the media and click Burn to disc.
- After the burn completes, eject the disc and test it: if AutoRun is disabled, click DICOMViewer.exe on the disc to confirm the study displays correctly.
Viewing DICOM Files
To view DICOM files, drag-and-drop them onto the MODALIZER+ window – one or more files, an entire directory, or a DICOMDIR file. You can also drop files and folders directly on the MODALIZER+ desktop icon.
Read the full DICOM Viewer Guide for measurement tools, CINE playback, the DICOM header/editor, and more.
Connecting to a PACS/RIS
Get the most out of MODALIZER+ by connecting it to a PACS and/or RIS. Once integrated with your Storage and Worklist servers, you can use Modality Worklist to pull patient and procedure parameters, and Query/Retrieve to search for studies already stored in the PACS.
See Storage Servers configuration and Worklist Servers configuration for setup details, or read more about MODALIZER+ PACS & RIS Integration.
The Local Archive – Mini PACS
MODALIZER+ doubles as a Mini-PACS. The built-in Local Archive stores every study you create, convert, or import according to the DICOM standard, using the DICOM file format, registered in the application’s internal database. To disable it, open the Settings screen and uncheck “Use Local Archive”.
The Local Archive is a hierarchically structured storage place (Root folder / Study folder / Series folder / DICOM files) backed by a built-in SQLite database. From the Local Archive screen you can search, view, export, and delete stored files, and add new DICOM files to an existing study.
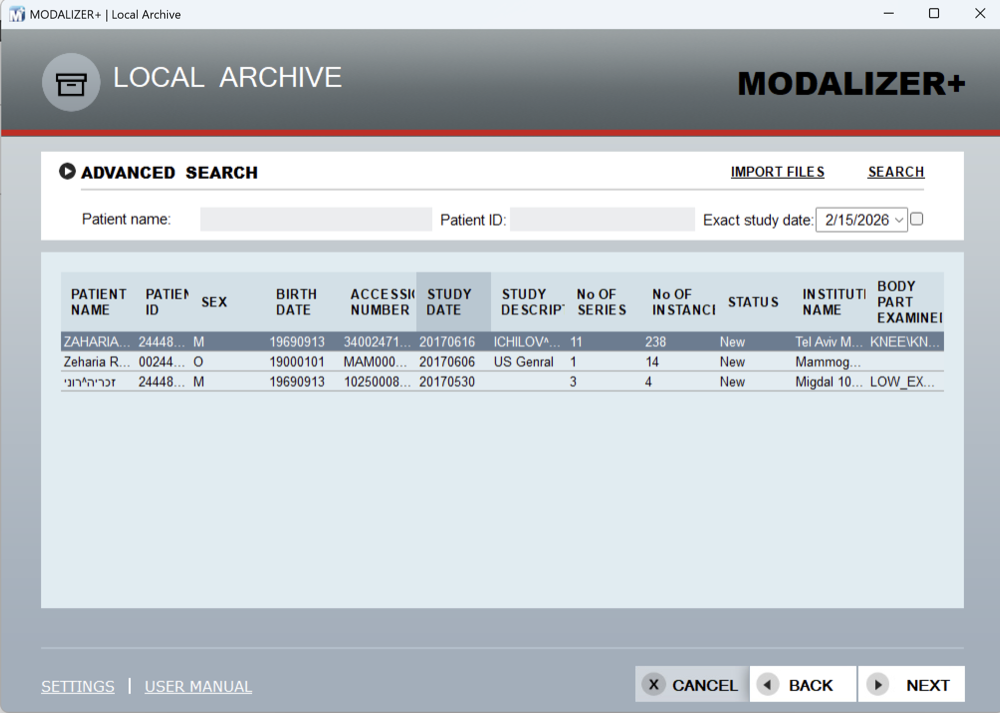
- Select Local Archive from the main screen. Results are sorted by study date, descending, by default. Expand the advanced search option for additional search fields.
- Double-click a result row, or select it and click Next, to open the study in the Viewer.
- Click Import files to scan a folder of your choice, copy valid DICOM files into the archive, and register the studies found in the database.
- Right-click a row to export or send the study to PACS, delete it, or add a new series to it.
See Local Archive configuration to change the storage folder and clean-up rules, or read more about using MODALIZER+ as a mini PACS on your desktop.
DICOM is the registered trademark of the National Electrical Manufacturers Association for its standards publications relating to digital communications of medical information.